24.7.14

mixed media ArtistTradingBlocks (tea box) with the Alice in Wonderland


Alice:  This is impossible
Mad Hatter: Only if you believe it is... sometimes I've believed as many as six impossible things before breakfast.

step1: cut 2 blocks using Eileen Hull 3-D block XL Die and mat board.
(as you can see below, before gluing it all together I cut more shapes I needed inside the block). To put the box together we need to adhere 2 pieces (one just above the other) onto the third one.

step2: the forth piece we use to make a lid

now let the fun begin!
step3: I used tons of different stencils with texture paste, some shapes I cut from mat board  and other embellishments to give more texture and character to the whole thing ^.^ before gluing and applying anything though I coated all the box with a matte Mod Podge.
!Here also I can say that using stencils on a 3-D shape might be a bit tricky, probably it is more convenient to add the texture before gluing the box together. For me somehow it is easier to add modeling paste after putting the box together, gives me the better control over the desired result ^.^


step3 : now we can add color and more detail to our project. Before applying anything I added a generous coat of gesso to even a bit the surface and to add more "tooth" for the color to hold onto ^.^  after that I used Gelatos (love the texture and the the way these colors mix). To tone down the vibrant colors I applied a coat of white gelato. To tell you the truth I was having so much fun adding colors, washi tapes and stamping  that I totally forgot to make some more photos for you of the whole process.
 
  the dies, that I used to make a table, were Tim's Sewing room and Pediments

that is pretty much it, now let me show you the result of my creative adventure


 the acetate shapes are from Kaisercraft "through the looking glass", I adhered them using 3-D foam squares


wow! that was too many photos I guess, the truth is that I had even more and it was so hard to choose, I liked the project so much that I wanted to post them all ^.^ 

for more amazing Artist Trading Blocks creations be sure to stop by The Artists on the Block .
And don't forget the Art With Heart July challenge is still running and some amazing prizes are waiting there for you ^.^  So don't be shy and share with us your art with heart !!!

P.S. I hope you didn't get tired from this huge post ^.^ thank you for stopping by. wish you crafty inspiration 


materials:


27.6.14

album for a baby boy ^.^

hello guys! one quick post today, just to share with you an album I made for a baby boy ^.^

 although to make cover I used paper I added some cotton filling before covering the chipboard so the cover is very soft to touch ^.^ (It looks a bit like a pillow I wish it would show in photos )

I was also asked to make a card to match the album, That gave me an idea to make some small pockets in the inside of the front cover that can hold the card ^.^

And here's some inside pages decorations ^.^


 thank you for stopping by ^.^ wish you crafty inspiration and joyful summer

19.6.14

ArtistTradingBlock time

Hello everyone ^.^ At last it is time for the Artist Trading Block. I was thinking that I still haven't done any box with ATB dies, well let's see what we can do about it ^.^...

first of all I cut a piece of mat board with Sizzix ScoreBoards XL Die-Blocks/Cubes, 3-D, after that I covered all the pieces with one of my favourite washi tapes
 then I used Tim Holtz Frameworks Trellis die to cut the pieces of Artist Trading Block, at this step I also used my new fave Blend ink (thank you EileenHull ^.^) to highlight the inside shape
 but before putting the Block together I adhered some strips of paper especially cut to fit behind the main die cuts

  well that's it, after that, all you need is your imagination and your favourite embellies (it is my new word for "embellishments") ^.^


Thank you for stopping by ^.^ wish you crafty inspiration and hopefully see you soon here at my crafty little home ^.^ 
Oh and by the way If you like to celebrate the Art With Heart Challenge is all about Summer Celebrations this month. Stop by to find a lot of inspiration for celebration and share your celebration creations there for a chance to win a Sizzix prize pack! ^.^ 


materials:
  

16.6.14

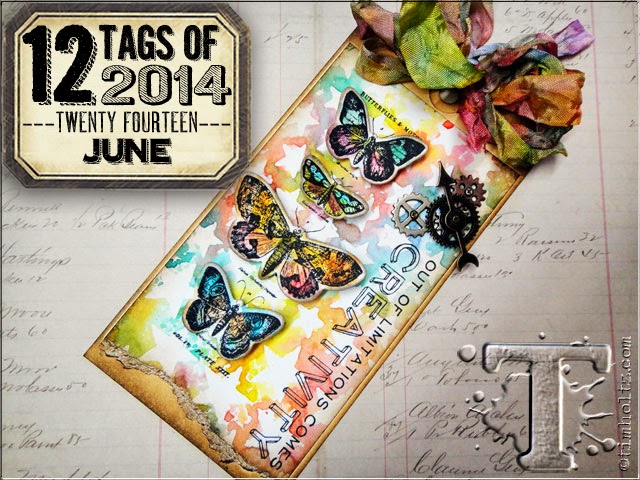
inspiration from Tim June tag ^.^

Today I'm creating with Tim Holtz. My source of inspiration is his this months June tag 

and here's what I came up with ^.^ hope you like it


 while I was playing with masks and inks I ended up with a looot of amazing backgrounds, which inspired me to make some layouts for my mini album I'm working on now ^.^

and one more with fresh summer feel

P.S. Thamk you for stopping by ^.^ wish you fresh and crafty inspiration 

oh! I'm also sharing this tag at A Vintage Journey for the "wings and things challenge" .Wish me luck ^.^

14.6.14

journey notebook

a notebook I made for a dear friend of mine ^.^ I used 7Gypsies vintage frame book cover and applied Vintage Photo distress paint over it for more vintage look


 also I added a few pocket pages for photographs, cards and any other memorabilia


 Thank you for stopping by ^.^ wish you creative inspiration