
Hello everyone ^.^ Today I'm going to share with you a project I did as a Memories Trend design team member. These are some ideas I have for the coming winter holidays. It is a mini cards holder


And you can always make one of these yourself too. Let me share with you how ^.^ note that at the end of the post I'm going to add a PDF file with dimensions and some how to 3-D images so don't worry it's really really easy to make this cards holder ^.^
1.First of all cut your card stock (I used the quite thick one, it is a lot like Tim Holtz's grungepaper) and score it along the folding lines

2. Cut decorative edge (this will be the free top of our folder)

3.Add color to the inner side of the holder, as it is going to be not much visible side I haven't done more than coloring here.
 for now let's set aside our holder to dry and make some cards for it
4.Here are some materials I used for making cards (and for decorating my folder also)
5. As for the cards not much to show. All I did is to cut some decorative paper pieces an layer it on simple white card stock (used as a base and folded in two). For edge distressing I used Adirondack paint dabber which we used earlier for holder coloring, also to create a 3-D effect with the main pieces (which I cut from October Afternoon mini postcards set) I adhered them with 3-D foam squares

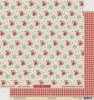
6. As soon as our folder is dry and ready cut some designer patterned paper to cover the outer side

7.After that we are ready to start folding and gluing the folder together
8.The finished result. All you have to do now is to embellish and enjoy ^.^
 as you can see I also distressed the edges of the holder with the same Adirondack dabber paint we used earlier
Now the link to the the PDF file which I promised you with all the other details you need :
https://drive.google.com/file/d/0Bxds-moAclZJQmJvQ1ZjWmJaWGM/view?usp=sharing
P.S.thank you for stopping by ^.^ wishing you crafty inspiration


and few cards to fit in ^.^
And you can always make one of these yourself too. Let me share with you how ^.^ note that at the end of the post I'm going to add a PDF file with dimensions and some how to 3-D images so don't worry it's really really easy to make this cards holder ^.^
1.First of all cut your card stock (I used the quite thick one, it is a lot like Tim Holtz's grungepaper) and score it along the folding lines
As I already mentioned at the end of this post I'll add the file with
all dimensions you need so don't worry about the sizes for now.Let's
just see how it goes in general
3.Add color to the inner side of the holder, as it is going to be not much visible side I haven't done more than coloring here.
4.Here are some materials I used for making cards (and for decorating my folder also)


5. As for the cards not much to show. All I did is to cut some decorative paper pieces an layer it on simple white card stock (used as a base and folded in two). For edge distressing I used Adirondack paint dabber which we used earlier for holder coloring, also to create a 3-D effect with the main pieces (which I cut from October Afternoon mini postcards set) I adhered them with 3-D foam squares


I also used some designer brads and to to accent the snow I applied some Ranger stickles
6. As soon as our folder is dry and ready cut some designer patterned paper to cover the outer side
7.After that we are ready to start folding and gluing the folder together


8.The finished result. All you have to do now is to embellish and enjoy ^.^
Now the link to the the PDF file which I promised you with all the other details you need :
https://drive.google.com/file/d/0Bxds-moAclZJQmJvQ1ZjWmJaWGM/view?usp=sharing
P.S.thank you for stopping by ^.^ wishing you crafty inspiration
supplies:
Such a clever and beautiful project Oxana! Thanks for the inspiration!
ΑπάντησηΔιαγραφήthank you Christina ^.^
ΔιαγραφήWhat cute cute images! LOVE the retro feel and the pockets!
ΑπάντησηΔιαγραφήthank you very much Anita ^.^
ΔιαγραφήLovely project! Great vintage feel to it!
ΑπάντησηΔιαγραφήthank you Valia ^.^
ΔιαγραφήOxana...your work is awesome! I so love this little mini card holder. The papers have such a retro-ish feeling to them. Thanks so much for sharing how you created this sweet little card holder. It's darling. I also wanted to thank you for stopping by my blog and leaving such a nice comment. It makes me so happy to know that you find inspiration from my blog. Thanks for letting me know that! I also find inspiration from yours...such lovely work! <3 Candy
ΑπάντησηΔιαγραφή